Demo:
https://www.roblox.com/games/11145814918/Iris-Demonstration
Iris
Iris is an Immediate mode GUI Library for Roblox, Based on Dear ImGui. It solves the same problems as Dear ImGui. It is fast, portable, and self-contained (no external dependencies).
what is Dear ImGui, and why is it important?
Dear ImGui is best known for its use for developing debug UI. Using the Dear ImGui paradigm (Immediate Mode), UI is remarkably easy. Because of this, Dear ImGui has seen adoption in almost every major game engine, including Unity and Unreal Engine (and now Roblox!).Iris favors simplicity and productivity; It is designed to simplify UI, streamlining the process for creating visualization, debug tools, and data input. To accomplish this, Iris offers a different approach to Roblox UI than existing libraries, lacking certain features commonly found in more intricate UI libraries. Iris opts to supercede the Roblox UI API, instead having a streamlined Immediate-Mode library and a set of widgets whcih developers can use to create UI easily.
Usage
The Iris release comes as an rbxm or zip file. You can import the rbxm into any roblox project, and begin creating UI in any client side script. No external dependences are needed. Iris can be used in any kind of Roblox UI, including PlayerGui, CoreGui, BillboardGui, SurfaceGui, and PluginGui.
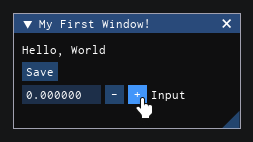
Heres a basic Example:
local StarterPlayerScripts = game.StarterPlayer.StarterPlayerScripts
local Iris = require(StarterPlayerScripts.Client.Iris).Init()

Iris:Connect(function()
    Iris.Window({"My First Window!"})
        Iris.Text({"Hello, World"})
        Iris.Button({"Save"})
        Iris.InputNum({"Input"})
    Iris.End()
end)
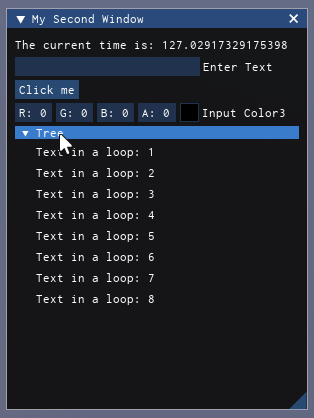
And a more complex Example:
local StarterPlayerScripts = game.StarterPlayer.StarterPlayerScripts
local Iris = require(StarterPlayerScripts.Client.Iris).Init()

Iris:Connect(function()
    -- use a unique window size, rather than default
    local windowSize = Iris.State(Vector2.new(300, 400))

    Iris.Window({"My Second Window"}, {size = windowSize})
        Iris.Text({"The current time is: " .. time()})

        Iris.InputText({"Enter Text"})

        if Iris.Button({"Click me"}).clicked() then
            print("button was clicked")
        end

        Iris.InputColor4()

        Iris.Tree()
            for i = 1,8 do
                Iris.Text({"Text in a loop: " .. i})
            end
        Iris.End()
    Iris.End()
end)
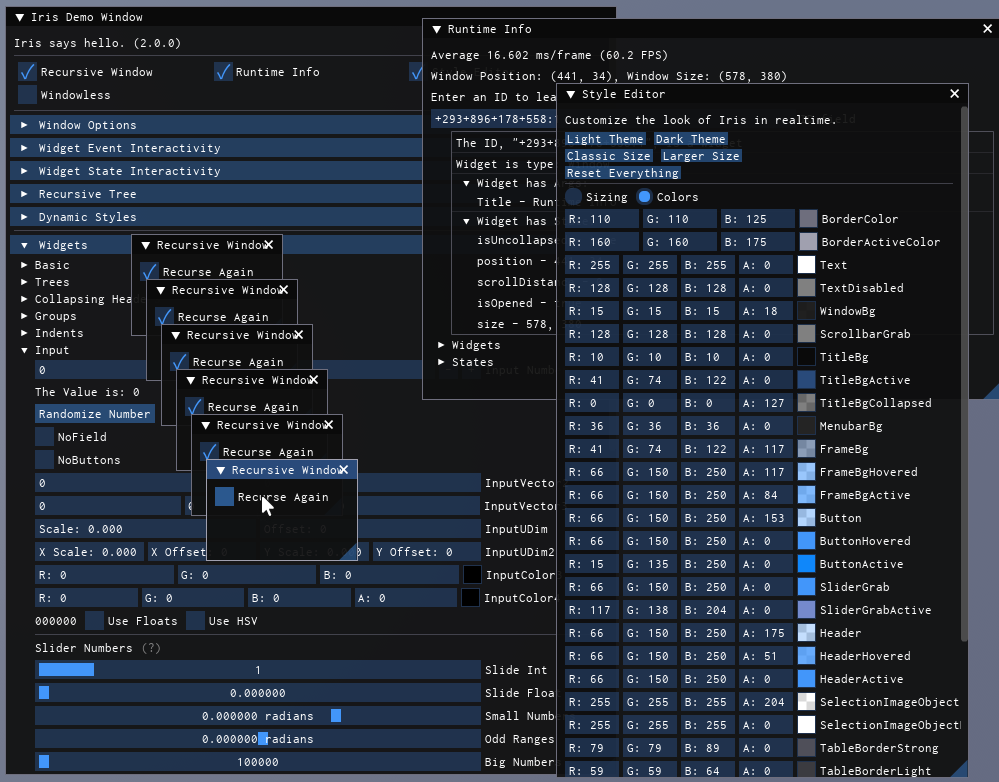
The appearance of Iris is fully customizable, including colors, fonts, transparencies and layout. By default, Iris comes with a dark theme and light theme, as well as 2 layout themes.
Iris.UpdateGlobalConfig(Iris.TemplateConfig.colorLight)
Iris.UpdateGlobalConfig(Iris.TemplateConfig.sizeClear)

Iris:Connect(Iris.ShowDemoWindow)
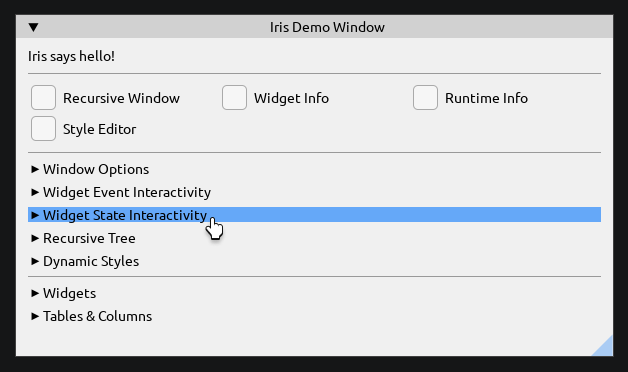
Finally, Iris comes with a demo window, Iris.ShowDemoWindow. This window demonstrates the functionality of every part of the library, and contains useful utilities, like a style editor and a runtime information window. It is a useful reference for you and other coders can to refer to.
How it Works
Iris is an immediate mode UI library, as opposed to retained mode.
In a retained mode model, you might make a button and connect a clicked event, with code that is invoked when the event happens. The button is retained in the DataModel, and to change the text on it you need to store a reference to it.
But in an immediate mode model, call the button function and check if it's been clicked immediately, and you do that every single frame (60 times per second). There's no need for a clicked event or to store a reference to the button.
Check out the Dear ImGuis About the IMGUI paradigm section if you want to understand the core principles behind the IMGUI paradigm.
Credits
Developed By Michael_48, SirMallard and JakeyWasTaken. Inspriation and design: Omar Cornut, Evaera, Thanks!